Today I am going to teach you guys how to connect any two or as many as windows PC through remote without using any third-party tool like team viewer etc. So let’s learn how to share screens without any third-party tool. As we all know Windows OS is full of hidden programs that are only limited to developers or geeks.
MSRA For Remote Screen Sharing in Windows 10
Today we are going to learn about MSRA (windows remote assistance) executable. MSRA is windows inbuilt remote assistance program using which you can control remote PCs, share remote screens, provide remote support, and much more. Let’s learn how to use MSRA for remote sharing.
Steps to Share or Control Remote PC using MSRA
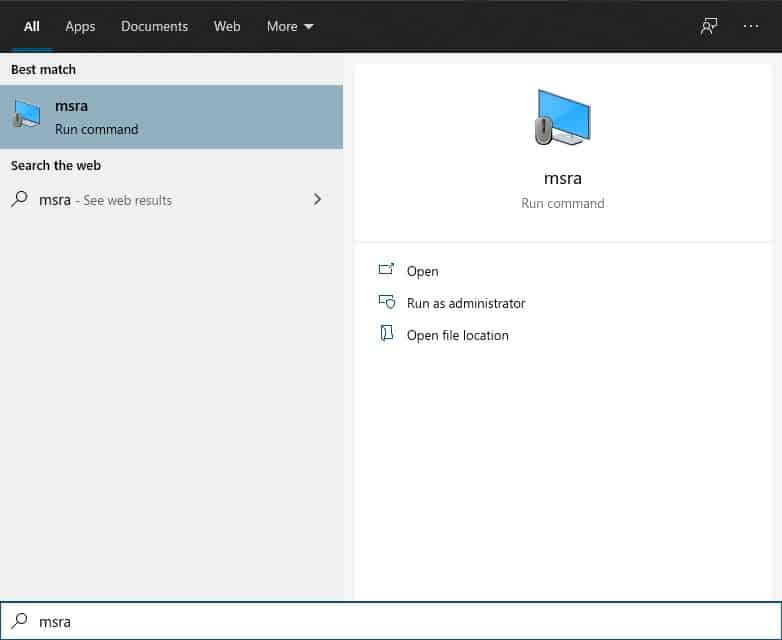
First of all click on startup and type command “MSRA” and press enter as shown below:
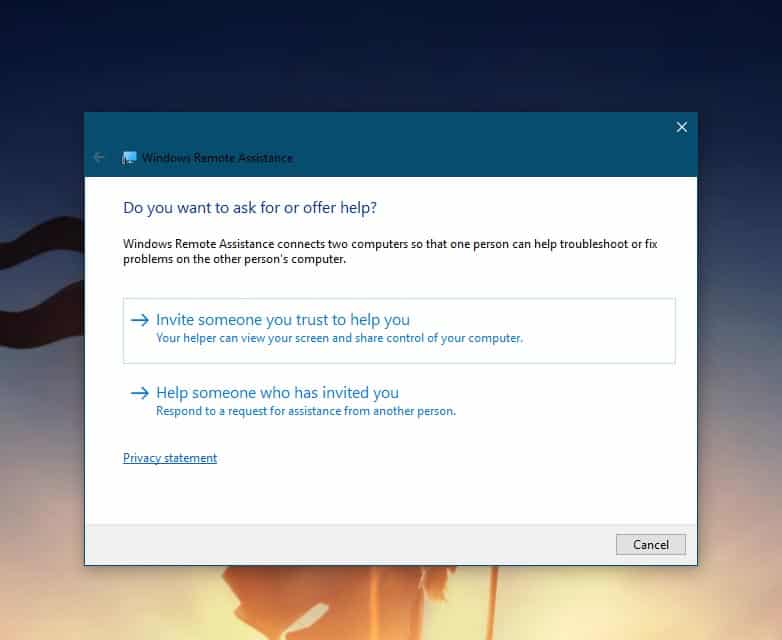
Now you will see a screen like the below-having title “Windows Remote Assistance“, there are two options displayed:
Invite someone you trust to help you: Choose this option if you want to share your screen with someone. Help someone who invited you: Choose this option if you want to control someone other PC remotely.
Click on Option a “Invite someone you trust to help you” to share your screen:
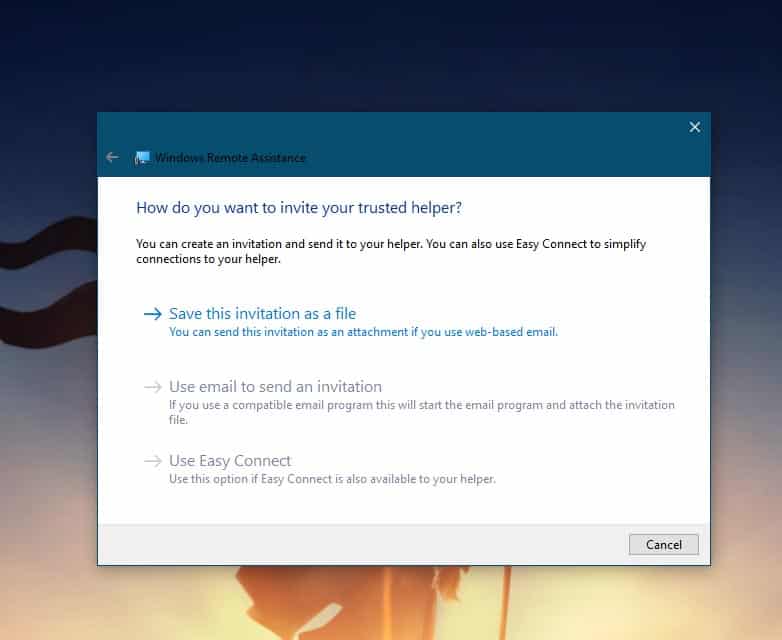
Once you click the above option then you will see the below panel with multiple options:
Now you can see three different options :
Send this invitation as a file: On clicking this option you can save the invitation file and send it to anyone from which you require help. After saving the file another window will open containing the password. You have to provide that password to a person whom you want to connect to your machine.
Use email to send an invitation: You can send an invitation directly via email but it requires an email client on your machine to send emails like outlook etc.
Use Easy connect: Another method to directly connect two PC is using Easy connect but this requires some basic settings at your router’s end i.e. If the computer has IPv6 disabled or is behind a NAT router that blocks Teredo traffic, the Easy Connect option will be unavailable.
Now once you have sent the remote assistance invitation file to a user, he can connect to your PC by double-clicking the invitation file and then entering the password. Note: You need to enable remote assistance service. 3. Help someone who invited you: By clicking this option you can provide help to anyone who has done the above task. You will need two things: An invitation file and a password to connect remote PC. Did you know there is another smart option by which you can directly connect to any PC using an IP address? If not, well let’s learn that too. Yup, we can also provide windows remote assistance support using an IP address too. Here are the options.
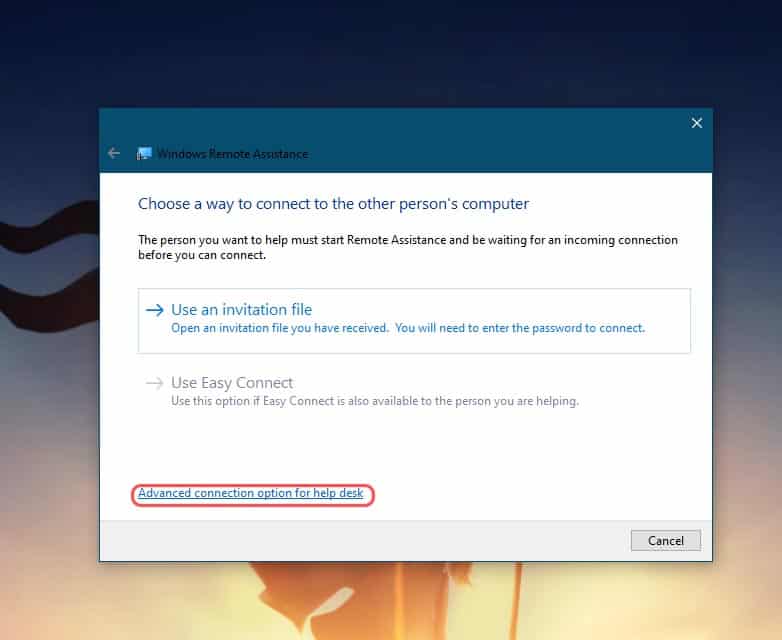
First of all click on startup and type the command “MSRA” and press enter. Now you will see a screen where two options are displayed, Select “Help someone who invited you”. After that you will see some options, click on the bottom one “Advanced connection option for help desk” as shown below :
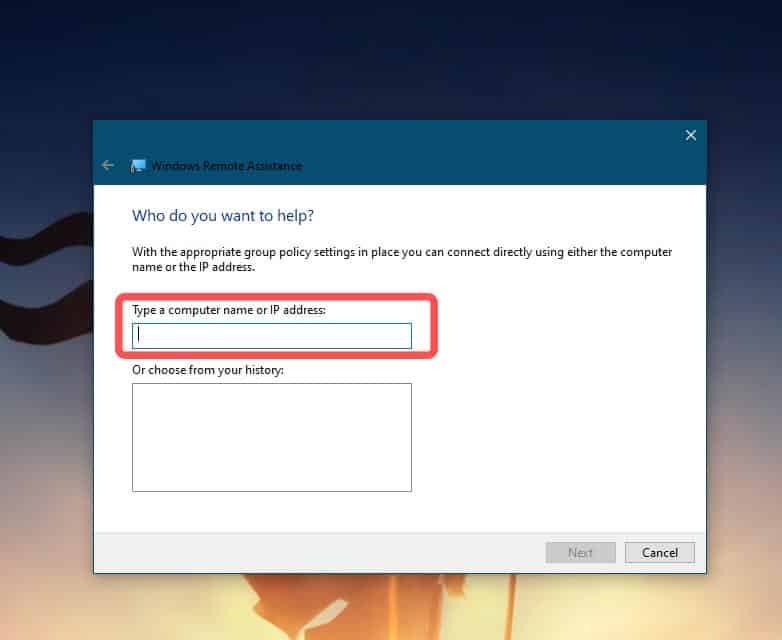
After clicking the option you see the below the panel to enter the IP address:
After entering the IP address press Next to connect to IP address. That’s all. Hope you all enjoyed the learning. If you have any queries ask me in form of comments.
